
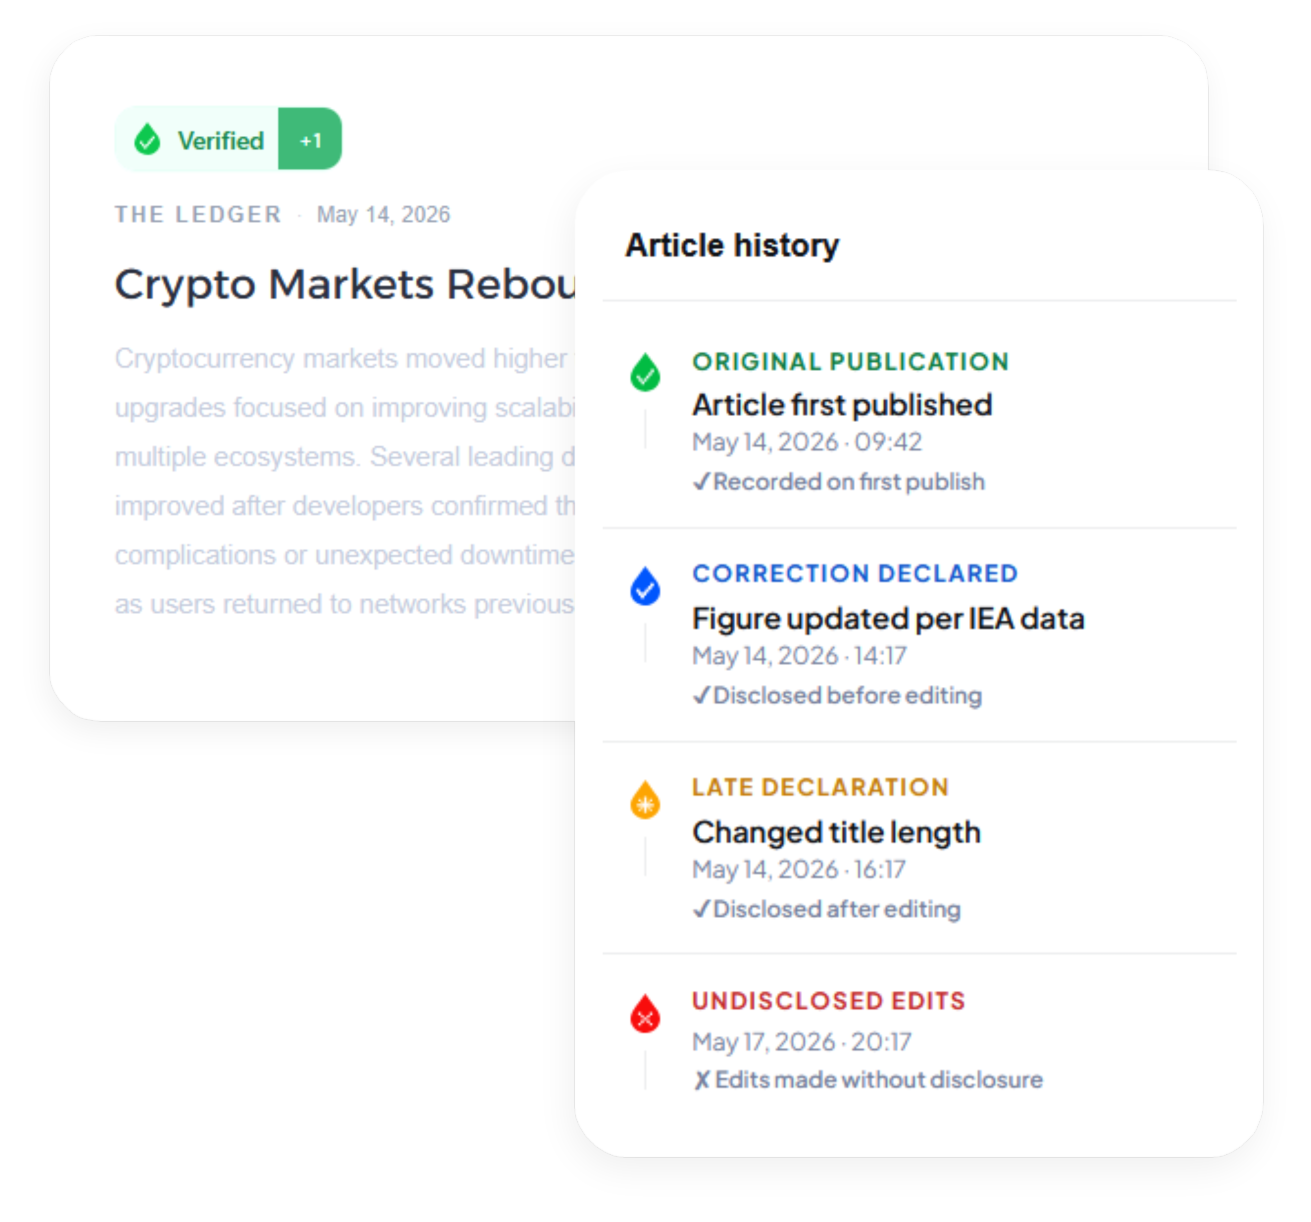
How it works
When you publish an article through ProofDrop, we compute a SHA-256 hash of the article content and record it on the XRP Ledger. This creates an immutable timestamp proving what was published and when.
If you need to correct an article, you declare the correction in ProofDrop first. The disclosure is recorded on-chain before the edit is made. ProofDrop then monitors your article for content changes and checks whether a corresponding disclosure exists. Changes without disclosure are flagged as undeclared edits, visible to anyone who checks the verification badge.
Your article content never leaves your servers. Only the cryptographic hash is sent to ProofDrop and recorded on the XRPL. No one can read your article from the blockchain.
Verification badge states
- Verified Published and unchanged since original fingerprint.
- Correction declared A correction was disclosed before the edit was made.
- Late declaration A correction was disclosed after the edit was made.
- Undeclared edit Content changed with no corresponding disclosure.
Step-by-step guide
Follow these steps to get your first article verified on the XRP Ledger.
Connect your publication
In your ProofDrop dashboard, go to Settings, then Publications, and add your website domain. We will generate a lightweight monitoring script you paste into your site head tag.
Takes about 2 minutesPublish your article as normal
Write and publish through your existing CMS. ProofDrop detects the new article automatically and anchors its fingerprint to the XRPL within seconds.
Fingerprint anchored in 3 to 5 secondsAdd the verification badge
Copy the badge embed code from your ProofDrop dashboard and paste it into your article template. The badge updates automatically based on the verification state.
Declare a correction before editing
When you need to update an article, go to ProofDrop and click Declare correction. Enter a brief explanation of what you are changing and why, then submit. ProofDrop records the disclosure on-chain.
Do this before saving the edit in your CMSMake your edit and publish
Update the article in your CMS and publish. ProofDrop detects the change, matches it against your declared correction, and updates the badge to show a verified correction with the full disclosure visible to readers.